Use Nature’s Recipe To Quickly Create a Foolproof Garden of Eden!

delicious fruit and nuts - Use Nature’s Recipe To Quickly Create a Foolproof Garden of Eden!

Free Food!

Who wouldn’t want to live in a carefree food forest where little work is required, and delicious fruit and nuts are abundant?  A Garden of Eden, right?  Believe it or not, Gardens of Eden do exist in real life and we can easily plant them in our back yards or as entire orchards.

A Garden of Eden would be based on plants that work together to form a synergistic web of life.  Different heights, plant functions,root structures, and countless other intricacies and dependencies have evolved in native forests to make plant partnerships (or guilds) that have withstood the test of time.  These guilds don’t require outside fertilizers or care and they provide food year after year after year, just like a native forest.

It’s Hard Work to Re-Invent the Wheel… So Don’t Try!

Passionfruit is delicious, has an incredible tropical flower, and is the host plant for many butterflies.

I’ve tried my hand at designing guilds to make food forests.  To make a guild, I  place plants together that I think would help each other.  I first pick a canopy (or overstory), and then a sub-canopy (or understory) and some shade-tolerant bushes.  One third to one half of my trees/bushes/plants are nitrogen fixers for natural fertilization.  I make sure to choose vegetation with different root structures and of course we need a ground cover.  I add vines for good measure.

That is a lot to remember!  I have read dozens of books, spent long hours on the internet and have 28 years of farming experience. I’ve spent much time agonizing over whether or not these guilds were going to work because there is no guarantee.  There is just the enticing promise of knowing that if it does, it will be spectacular.

After hundreds of hours of researching, memorizing, and racking my brain, I realized that I have the recipe built into my climate and soil if I simply pay attention.  If let my pastures go without grazing or mowing them, natural succession would eventually move them to the final stage of an Oak-Hickory forest.  Hmmmm.  Hickory nuts are edible, and acorns can be processed into flour!  Free food, no work.  Better yet, pecans are in the hickory family and chestnuts are in the oak family.  Both are native to this forest, and both are delicious.  How amazing is that?  What other food is in this forest?  What if I sped up succession and planted an orchard that used the same species that would naturally grow here?  Instant foolproof food forest!  Eureka!

Follow Nature!  All the Work is Already Done!

Patterning an orchard based on an existing Garden of Eden makes all the sense in the world.  It is the holy grail of designing a food forest because success is guaranteed, or at least a lot more likely.  We are following the well-worn path of nature instead of trying to blaze our own trail and getting lost.

Both Asian (left) and Native (right) persimmons are delectable treats.

The Oak-Hickory ecosystem is the largest deciduous forest ecosystem in the Southern and Central United States.  It feeds kajillions of animals every year, and has helped keep human inhabitants fed for millennia.  This Oak-Hickory forest runs North-South from Rhode Island to northern Georgia and East-West from South Carolina to Ohio with scattered patches elsewhere in the US and Canada.

The South Carolina Department of Natural Resources has a listing of South Carolina ecosystems called The Natural Communities of South Carolina Initial Classification and Description by John B. Nelson.  It’s not an easy read.  The first time I picked it up, I put it right back down after finding that our Oak-Hickory forest was a long dry list of Latin names.  I know some Latin names from my interest in gardening, but in general it’s not my first choice of languages.

After hearing several people lament that they wanted a guild for a food forest that they knew would work, I put on my big-girl britches and decided to decode the gibberish into something usable.  I took the Latin names, translated them, and then looked for the benefits of each species.  A surprising majority had delicious fruit/nuts.  Not every plant in the guild is useful for food, but that doesn’t mean it shouldn’t be included in your yard or orchard.  Many of the plants are good for wildlife, and/or are simply beautiful with mysterious ties to the rest of nature that we can’t even fathom.

Foolproof Fruit!

Pawpaws are a delightful, unique fruit you can easily grow. Make sure you have two cultivars so they can pollinate each other.

The fruit of my labor is in the table below.  My mouth waters at the thought of pecans, blueberries, highbush cranberries, pawpaws, persimmons and grapes.  Truly, a real Garden of Eden.

I have planted over 300 trees following this recipe, and am starting to reap the rewards.  The best part is that I have lost very few plants, even in drought years.

I look forward to many more years of wandering around eating fruit all year.

I hope you enjoy salivating over the possibilities in the table below.  You may even be tempted to change your name to Adam or Eve!  Happy Planting!


Oak-Hickory Forest Guild Members

Common Name

Latin Genus

Kirsten’s Use/Notes

Overstory

Oak Quercus Flour from acorns, lumber, one of the best wildlife trees
Chestnut* Castanea Chestnuts were not found in my Oak-Hickory research, but chestnuts are in the same family as oaks.    Oaks took over after Chestnut blight killed all of the Chestnuts in the East.  Chinese chestnuts that are not susceptible to chestnut blight are commonly grown in Piedmont soils.  Delicious edible nut.
Hickory Carya Most are delicious, but the nut meats are difficult to extract unless you boil them.
Pecan* Carya While not included in my literature search as a part of the Oak-Hickory forest, pecan is in the same Carya genus an is native to the Southeast US.  Delicious edible nut.
Red Maple Acer rubrum Seeds are edible, but can be bitter
Tulip Poplar or Tulip Tree or Yellow Poplar Liriodendron tulipifera Great pollinator attractor.  One of the best trees for honey bees.
Pine Pinus Wildlife habitat and food.  I have tried to grow Korean pines for pine nuts, but they did not do well in the Oak-Hickory system.  Other pines used for pine nuts in the US are primarily from the Southwest, so again, are not native to this region.  Native pines include white pines, which do not have a readily available, delicious nut.
Tupelo Nyssa Sylvatica Excellent pollinator attractor.  Fruit eaten by birds
Black Locust Robinia pseudoacacia Nitrogen fixer, goat/cow forage when coppiced, excellent nectary, delicious flower
Persimmon* Diospyros virginiana It is not widespread throughout the entire Oak-Hickory area, but in the southern and Mississippi Oak-Hickory areas it bears a delicious fruit with unrivaled sweetness when fully ripe.  Asian cultivars are also delicious, with larger fruit and better shelf-life.  Some varieties are even non-astringent.

Understory

Sourwood Oxydendron arboretum Excellent pollinator attractor
Flowering Dogwood Cornus florida Beauty, fruit for birds
Cornelian Cherry* Cornus mas Same Cornus genus as flowering dogwood.  Very tart cherry
Eastern Redbud Cercis canadensis var. canadensis Flowers and seed pods are edible.
Pawpaw Asimina triloba Largest native fruit in North America.  About the size of a mango, tastes like a custardy banana with an astringent afternote.  You either love them or you hate them.  Found in moist lowlands.  Primary host plant for the zebra swallowtail butterfly.

Vines

Muscadines Vitis rotundifolia Delicious grapes
Passion Fruit* Passiflora Incarnata Fragrant fruit and stellar flowers.  Native on forest edges Host plant to the Gulf Fritillary, Variegated Fritillary, Julia Heliconian and Zebra Heliconian caterpillars.

Shrubs

Hearts a bursting Eunonymous americana Excellent deer fodder (and therefore goat fodder. Goats and deer are in the same family)
Sweet shrub Calycanthus florida Fragrant flower.  Can be used for potpourri
Viburnum Viburnum This is the listing in the reference material.  See below for the actual edible species.
Highbush Cranberries* Viburnum triloba Note that this is not the same as regular cranberries.  Also, most viburnums are mildly poisonous to people, but Highbush Cranberries are not.
sweetleaf, horse-sugar, yellowwood Simplocos tinctoria Tea from leaves.  Host to butterflies.
Blueberry, cranberry, huckleberry, lingonberry Vaccinium All edible.  Some may prefer colder/warmer/drier/wetter habitats than others.  Research before planting.

*Not from original natural community.  I added it because the genus or family matched the listing in the original resource, and I knew it provided excellent food.
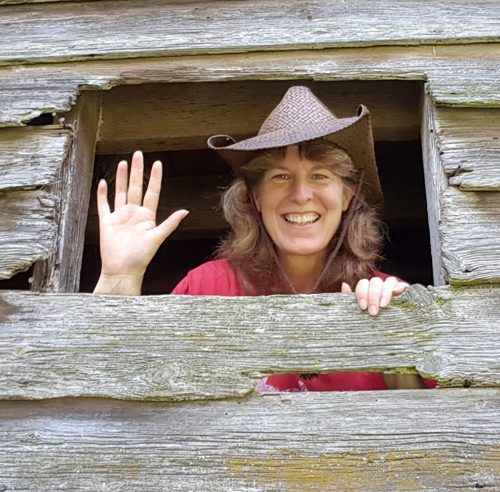
Mother Nature will reward you for paying attention. Enjoy your instant, foolproof Garden of Eden!


Kirsten Holland Robertson - Simple Soil Solutions and RegenaGrazeKirsten Holland Robertson is a regenerative farmer and SWCD Educator in Greenville, SC.  In addition to growing her own vegetables and raising her own sheep and goats in a dynamic permaculture based, holistically managed agroforestry silvopasture system, Kirsten manages the lively Facebook ReGenerative Grazing community group.  After finding Vail and joining the Grazing Power community, she has joined our team, partnering with SimpleSoilSolutions.com to create holistic grazing and soil building mentorship programs, and offers us support.  Look for RegenaGraze.com.

Share On Facebookpinterestlinkedinmail

Hugelkultur: I Made One, Now How Do I Maximize My Growing Potential On It?

HugelkulturHugelkultur beds are extremely popular in permaculture circles. Raised beds built over a mound of logs and woody debris, they are self-watering as the logs decompose, and provide intriguing microclimates with which to play.  There are multiple websites on how to build one, but how do you actually use them?  This blog addresses that.  It is not about constructing a hugel bed, but how to maximize your growing potential (in our southern climate, zone 7) after it is built.
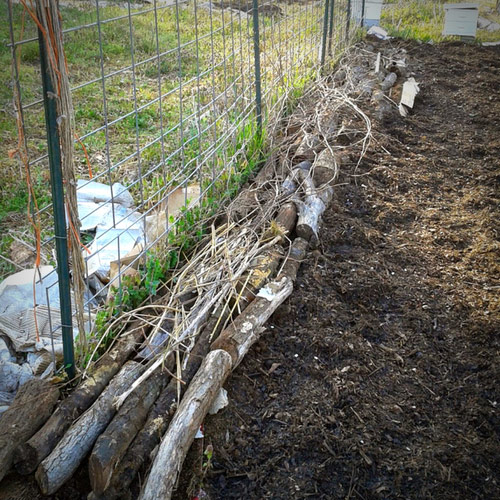
We installed three 30 foot long beds, 2.5 feet high, two years ago and oriented the beds running in the East-West direction.  One difference that I’ve seen between our beds and others is that we have a welded wire cattle panel fence running down the middle of the bed as a trellis.  I’ve used several different kinds of trellis, and the welded wire cattle panels with t-posts are by far the quickest, easiest and sturdiest of everything I’ve tried.

One side of hugelkultur with trellis constructionThe first two years with the hugels I didn’t have time to really think about where I wanted to plant things on the beds.  I threw stuff in, and it all grew.  I’m very happy with the results.  This year I decided to be a little more methodical about using the best properties of the beds – the fantastic microclimates.  Using a fence for a trellis is derived from the Square Foot Garden method by Mel Bartholomew.  He puts trellises on the north side of his beds and lets the tall and climbing plants grow there.  I have used his method for about 15 years so I can’t comprehend gardening without the trellis.  I trellis all vines, including cantaloupes, cukes, squash, and beans as well as tomatoes.  I tuck the tomatoes through the fence as they grow.  No strings or falling cages.  This keeps the fruit off the ground, makes it easier to harvest, allows air to circulate through the plants, and makes a LOT more room for other plants.
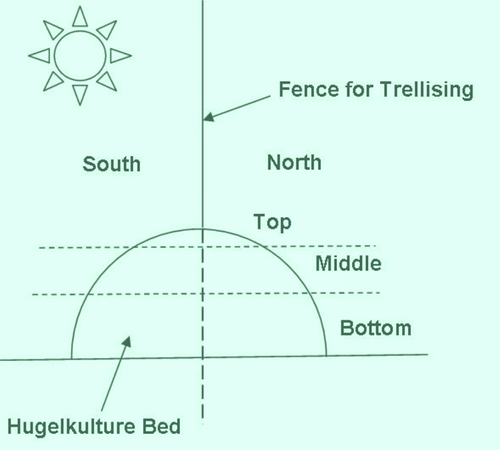
I chose my favorite plants, sorted them according to their favorite climate, and figured out where that might fall on the bed.  Let me just say here that the south sides of the beds are really hot and dry, and the Hugel Schematicnorth sides are noticeably cooler and moister.  It’s not rocket science, but when the contrast is so stark, it brings home the beauty of Hugelkultur.  In addition, the beds are drier at the top, and more moist toward the bottom.  This steps up the complication factor a little.
I decided that the top of the beds, which is about 2 foot of horizontal space (one foot on either side of the trellis), would always be used for trellis plants.  The top part is also drier, as I mentioned, so you may want to keep that in mind. I have irrigated my beds with drip irrigation, so I have a backup in case of extreme drought.

In my case, I separated my favorite trellis plants as follows:

TOP

Hugelkultur Top

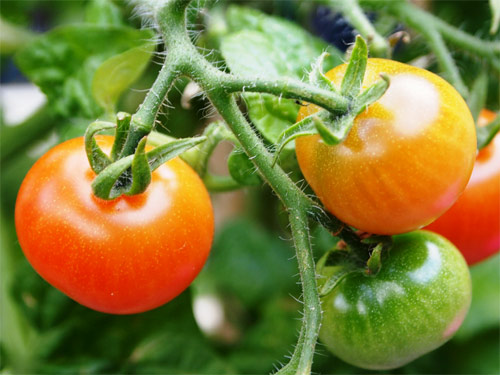
Closeup of tomato plantI can plant on both sides of the trellis, so I can plant cantaloupe and runner beans on the same trellis at the same point on the bed, just on either side of the fence.  This allows the beans to fertilize the heavy feeder cantaloupes.  I have done this, and used the Square Foot method, so there are 8 bean plants on one side of the trellis in a one-foot distance, and one cantaloupe plant on the other in the same one-foot distance.
The soil can support it nutritionally, and the trellis can support it physically, but harvesting is a real nightmare because the plants are so intertwined.  I suggest planting at spacing further apart than the Square Foot method for your hugel beds.

MIDDLE

The middle part has shorter plants, so they don’t compete for space like the trellis plants.  This is where I put in a lot of flowers as well.  I have read that you should have anywhere from 1/3 to 1/2 of your vegetable garden planted in flowers (preferably native) to keep the beneficial insects happy.  This ensures that something will be flowering at all times.

This is what I have used in the middles:

Hugelkultur Middle

For one bed (or more) I planted strawberries on both the north and south sides in the middles.  This happened by happy accident last year, and it extended my strawberry harvest considerably at the beginning and the end of the season.  This season extension is probably applicable for anything you plant.  It’s part of the excitement of experimenting with this type of bed.

BOTTOM

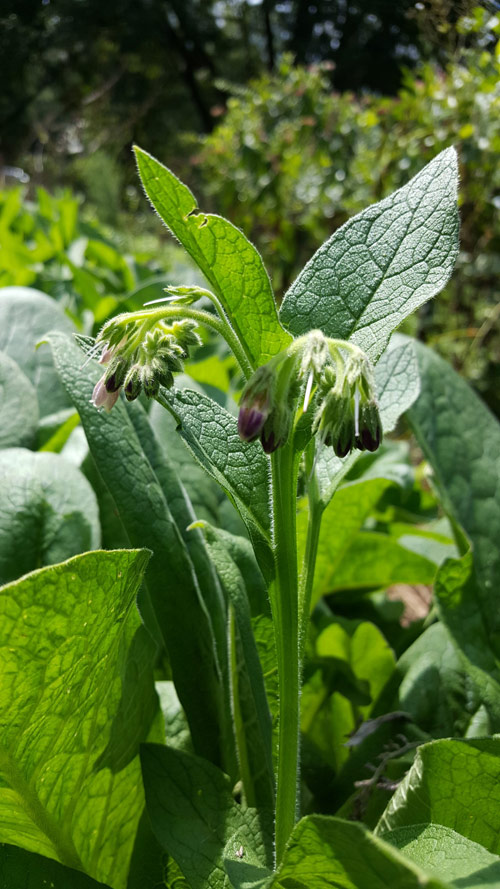
The bottom of my beds is almost vertical, and is frankly kind of ‘throw-away’ space in terms of directly growing food.  It doesn’t have to be for you, but that’s how it turned out for me.  I planted dock, sorrel and comfrey along the base of the bed, right at ground level.  Native flowers are also good here. These sturdy plants with long tap roots are a perfect fit here for a few reasons, most having to do with farm animals.  If my goats get into the garden they rush for the first green thing they see at eye level and start munching.  In my case, this is the dock.  It stops them dead in their tracks at the entrance to the garden.  They stop to eat the dock, thinking they are getting away with something, and I have a chance to run over, grab their collars and escort them out.  I find dock somewhat edible if I don’t have anything else, but it’s not my favorite.  It doesn’t hurt my feelings one bit if the goats eat it, whereas, I take great offence if they eat something I prize.

Comfrey in the garden

Another good reason for the deep rooted and native plants is for chickens that get into the garden.  Chickens naturally scratch at the corner between a vertical surface and the ground.  This makes the base of a hugel bed a favorite spot.  I’ve found that they can do quite a bit of digging around the dynamic accumulator plants with no ill effect.

The last reason that I like putting these plants at the base is because I tend to kick them and step on them when I am reaching up to harvest off of the trellis.  They take the trompling like a champ.

Just up from the dock and comfrey, but below the ‘middle’ area, I’ve put clover because it holds the soil, fixes nitrogen and attracts pollinators.  This is a great way to work toward my goal of 1/2 of my vegetable garden plants being flowers.

The north side on the bottom is perfect for mushrooms because it is the coolest and dampest part of the bed.  I used old logs, so couldn’t inoculate them with useful mushroom spores.

I’ve had more varieties of ‘wild’ mushrooms sprout out of the north sides of those beds than I even knew existed.  Maybe when I add new beds, I’ll inoculate the logs with some edible mushrooms.

Hugelkultur Bottom

HERBS

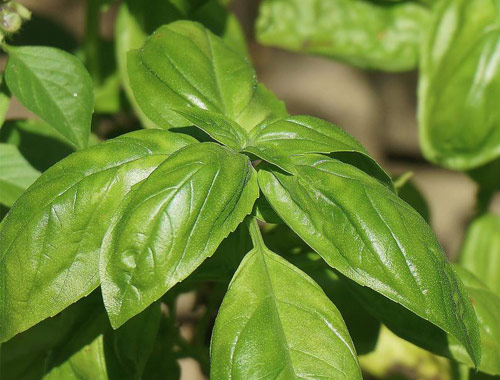
Closeup of basil plantHerbs are probably my favorite in the garden.  I enjoy being able to run out while cooking and grab something that makes the dish over-the-top amazing.  I plan to plant all of my herbs at one end of my hugel because there are so many perennials and biennials that make me happy.  If I intersperse them with the annual garden plants, I risk disturbing their roots every change of planting season on the hugel beds.  Yes, I realize that this is the purpose of an herb spiral, but herb spirals just don’t float my boat, AND, I already have a hugel built.  This is my list of herbs:
Hugelkultur Herbs

ROOTS

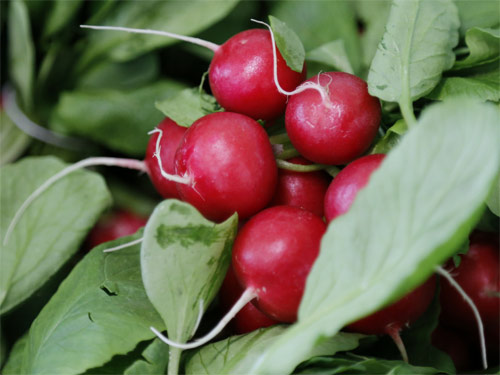
Close of radish - root plantI’ve also separated out root crops because of the whole root disturbance issue with surrounding plants.  I will plant a bed or a half of a bed in root crops alone.  I don’t recommend planting root crops until the hugel has had a chance to decompose some.  Otherwise the roots are growing down into the logs and aren’t easily harvestable.  The smaller root crops like radishes and small turnips are probably fine for the first few years or so.
This is how the root crops settle out in relation to sun needs:

Hugelkultur Roots

SPACE HOGS

A last category of plants is the group of plants that take a tremendous amount of space to grow.  This includes watermelons and vining squash.  Small watermelons (less than eight pounds) can be grown on a trellis, but I have come to the conclusion that watermelons and squash can take up room someplace other than the hugel beds because the hugel space is so intensively planted that it doesn’t make sense to have them there.  Watermelons and squash are great at making you feel like you are hacking your way through the Amazon.  After a while, you just don’t fight it, and the plants that the watermelons ate are left unharvested because it is too much trouble to get to them.  My watermelons this year were planted in a flat area away from the hugel beds.  Over the years I have learned to sheet mulch around the watermelon plants so that I don’t have to cultivate, and I don’t have five foot weeds preventing me from reaching the watermelons.

As an aside, I now have a good six inches of compost in the areas where I’ve been sheet mulching for years.  I use this to build up my beds when needed.

In summary, there are as many ways to build and plant a hugelkultur bed as there are people.  I look forward to hearing what you’ve done on yours in the comments below!


Kirsten Holland Robertson - Simple Soil Solutions and RegenaGrazeKirsten Holland Robertson is a regenerative farmer and SWCD Educator in Greenville, SC.  In addition to growing her own vegetables and raising her own sheep and goats in a dynamic permaculture based, holistically managed agroforestry silvopasture system, Kirsten manages the lively Facebook ReGenerative Grazing community group.  After finding Vail and joining the Grazing Power community, she has joined our team, partnering with SimpleSoilSolutions.com to create holistic grazing and soil building mentorship programs, and offers us support.  Look for RegenaGraze.com.

Share On Facebookpinterestlinkedinmail

Regenerative Grazing – Are You Doing it Right?

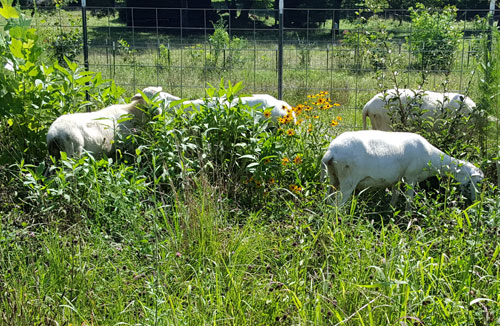
Mob Grazing GoatsI hear a lot of people saying that they want to ‘do it right’ when they start regenerative grazing. That is a noble goal, but in truth it’s a hard one to nail down.
Do it right for whom? The animals? The soil health? The wildlife? For you? None of these can be separated from any of the others. It is always a balancing act because so much depends on other factors that may be out of your control, like the time of year, animal status, weather, your health and time availability.

The difference in advice from experts should give us a clue that there is no perfect way to regeneratively graze. The experts’ recommended stocking densities vary dramatically. Which one is right? You may be surprised by my answer.

Let’s talk about four common misconceptions of ‘Doing it Right’:

  • I want to do it right, from the start!
  • The higher the stocking density, the better!
  • The more you move the better it is!
  • I don’t want to have to feed hay!

I want to do it right, from the start!

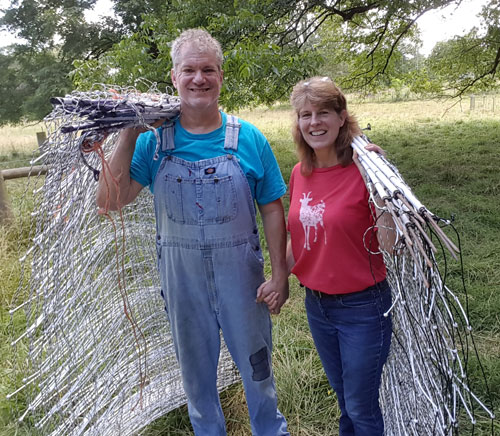
John and Kirsten Robertson with nettingWell, the bigger issue is just to get started! I procrastinated for about 15 years before actually starting. I decided to rotationally graze 20 years ago, bought the netting 15 years ago, and actually STARTED 5 years ago. There really is no wrong way to start. You just have to get out there and watch your animals and your forage and start trying different things. Everyone’s farm is different, so you are not behind, and you aren’t doing it wrong. If you are thinking about it and asking questions and making an effort, you are doing it right!
Greg Judy tells a story about an elderly grazer who desperately wanted to start rotational grazing after hearing Greg speak. After thinking it through, Greg helped him set up a single line through his pastures, splitting his pastures into two paddocks. The farmer was tickled pink.  Was it the right way to do it, with only two paddocks? Yes, indeed, in this case it was. He didn’t have the physical ability to move a lot of fencing and waterers on a regular basis, so this was the best alternative. ‘Right’ is a relative scale which has to include the farmer’s life factors, including health and available time.

I took an Introduction to Holistic Management course this past fall, and the biggest surprise for me was that only a tiny portion of the course taught us about actual grazing. The rest was evaluating my goals, my family’s goals(!), my facilities and my available time to figure out the best solution for my farm. In figuring out the ‘right’ way to do things, we have to take a holistic view of all of the factors in the farming equation.

The higher the stocking density, the better!

It looks like mob grazing, with very high densities for very short durations and long rests (at least 45 days) may not be as beneficial as initially thought. Look up Dennis Hancock’s summary of the scientific literature on mob grazing. His research shows that mob grazing comes in second to rotational grazing in areas such as animal performance, organic matter, consumption vs. trampling, mulch left, soil temperature and moisture, and soil compaction. Evidently, pushing the system toward mob grazing is not the holy grail of grazing. You can stop stressing about trying to push for higher densities!  Whew! Now don’t you feel better?

The more you move the better it is!

I know a woman who moved her cattle four times a day. Yeah, that’s a LOT! Did her animal performance improve? Why yes, unsurprisingly, yes it did. Did it run her ragged? Actually no. She was going through a rough patch and needed that quiet time to herself and with her animals. It brought her peace and joy. Note that she did not continue this long-term because her life changed again, and she was no longer able to spend that time moving the animals. That was OK too.

Moving your animals can be really good for them, but it may at the same time be really bad for you. Sometimes life doesn’t let you enact your plans like you want. You can always drop back to Plan B.  And that’s OK.

I don’t want to have to feed hay ever again!

This is probably the goal I hear most from regenerative grazers, and to be honest I had this goal until just recently. Going without hay is actually possible, even in the driest drought, as long as I am willing to partially (or fully) destock. That’s a tough one for me, especially since I’ve become attached to my breeding stock.

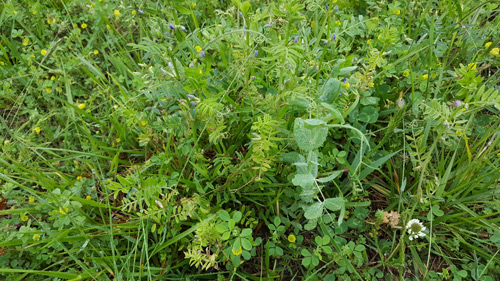
Pasture ForageMy hay feeding went down by 50% the first year I regeneratively grazed, but I realized in the following years that feeding hay was not a bad thing. It serves several stacking functions. If I feed by spreading the hay out on new pasture every day when needed, I feed the animals and give habitat and food to the soil microbes. Hay covers the soil to keep the pounding of raindrops from loosening the top layer of soil during a storm, causing erosion. Hay gives me infinite options to hold my animals back in the summer if the next paddock is not ready to graze. Feeding hay in the spring along with lush grass keeps the animals’ digestive systems going and prevents bloating and the squirts. I have found, for now, that my regenerative grazing includes hay every season of the year.
My pastures have responded energetically to this treatment. The forage is SO much better than it’s ever been, and my stocking rate has increased by 50%. Eventually, I may be able to cut back on my hay some, when I get my soil health really humming, but I never plan to go completely hay-less. Do some people go hayless? Yes. Are they doing it right? Probably, because it would be cutting into their bottom line if not. Am I doing it right? Definitely.  For now, for my situation.

Don’t hold yourself to an impossible ideal of how to do it ‘right’. Do your best to nurture your animals and soil health, but don’t forget to nurture yourself. Just like in the airplane safety demonstrations, if you don’t take care of yourself first, you won’t be able to take care of others (including the animals and all of those lovely soil microbes!)

Healthy soils to you!


Kirsten Holland Robertson - Simple Soil Solutions and RegenaGrazeKirsten Holland Robertson is a regenerative farmer and SWCD Educator in Greenville, SC.  In addition to growing her own vegetables and raising her own sheep and goats in a dynamic permaculture based, holistically managed agroforestry silvopasture system, Kirsten manages the lively Facebook ReGenerative Grazing community group.  After finding Vail and joining the Grazing Power community, she has joined our team, partnering with SimpleSoilSolutions.com to create holistic grazing and soil building mentorship programs, and offers us support.  Look for RegenaGraze.com.

Share On Facebookpinterestlinkedinmail

Winter Growth – How to Grow Soil… and Ourselves THIS WINTER!

Winter is indeed upon us!

As record-breaking low temps linger over the East Coast and our own state of Virginia, I am struck by how dramatically the snow and ice crystals impact the soil.

Have you ever noticed how something magical happens beneath our feet when it snows or frosts, and when the moonlight hits the soil more – as many of the plant leaves are gone or bowing to the Earth?

There is something special about water in its crystalline form that stimulates the soil microbes to feed and build soil like crazy!  It’s like they know they need to prepare for the spring – way before we see any green on the plants, the biological activity starts drastically increasing.

Can you FEEL it?

If your soil is bare or overgrazed or without enough litter from dead or dormant plants…you may not have ever felt this sensation …or witnessed how the microbes eat up the soil cover like crazy to grow their communities and prepare for Spring’s flush of growth.

The same growth happens inside of me each winter – whether I am going deep within having a quiet night on the farm (rooting), or whether I am branching out by going to conferences to learn and strengthen my human relationships.

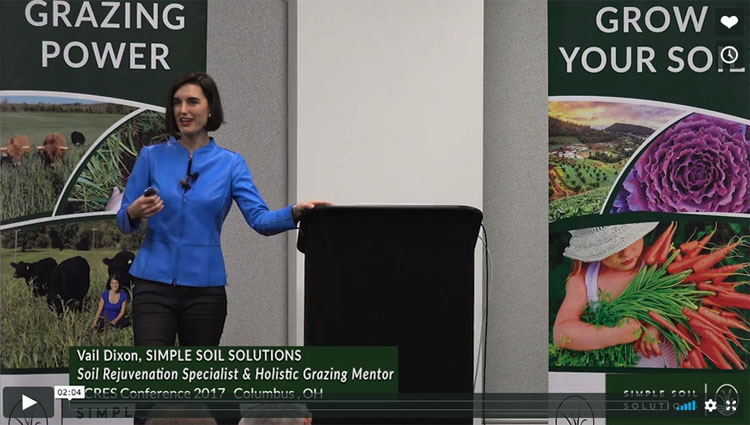
CLICK HERE to learn more about my insights with soil and cuddle up with the recordings of my presentations from the 2017 ACRES & BFA Conferences.  The first is about Using Nature as Mentor.  The second talk goes into our principles of how we improve soil, explores common pitfalls and misunderstandings, cover crops, weeds, and MORE!

Winter Growth - How to Grow Soil and Ourselves THIS WINTER!

I had a BLAST and learned so much from mentors like Dr. Christine Jones and Dr. Don Huber.  It was great to connect with so many passionate people from all walks of life, as well as learn from other amazing farmers!

I will be sharing more specifics of what I learned, as well as more tips to help your winter soil, in the weeks to come.  For now, let winter heal you and soak up some learning.  Be sure to share your insights with us and share with those you know who might like to watch.

P.S. – If after watching the video replays and powerpoint presentations on the Conferences Replay link above, you are ready to learn more and go deeper:

  1. Send us your questions and challenges by email to vail@simplesoilsolutions.com, and/or by commenting on this blog post.
  2. Join us by phone or computer for our next live GOT WEEDS? LIVE Discussion and Q&A Call on Tuesday, February 13, 2018 from 6:00 – 8:00 PM (EST).  CLICK HERE to register and get the details on how to join me on the call.
  3. Join us live on the farm for our next Pasture Walk on Saturday, February 24, 2018  from 1:00 – 4:00 pm (EST).
Share On Facebookpinterestlinkedinmail

A New Tool to Feed Your Family and Heal The Planet, Climate & Economy

What if I told you that by feeding your family better – you could help lower the cost of food and increase its quality and availability for us all?  How about if that same action on your part also stabilized the climate more quickly than cutting all fossil fuel emissions today – cold turkey?   What if you could shine a light on food you buy, and instantly KNOW if it was going to have the nutrition and beneficial compounds you need to fight cancer, heal your body and mind, as well as have awesome flavor, aroma and shelf life?

Now you can!  The good news is that the same growing methods that produce quality food also increase its quantity as well as benefit your community, the climate, ecology and economy.  Come read more about the Real Food Campaign, including the new tool called the Bionutrient Meter and Open Source Data Community & Social Network – where major global players in the public, private, non-profit, for-profit, research, education and consumer sectors are now able to link together in ways that have never before been possible!  

No longer will learning happen and be tracked in disparate databases – that do not talk to each other.  Now, we finally have a platform and open collaborative structure for discernment about what systems work best to produce the best food, economics, climate & human health outcomes, etc.  Until this moment, we did not formerly have any open source data structure that could assess these complex, multi-factor, multiple data sets in their relationships.  Now, sectors that seem unrelated like human health, animal health, soil health, nutrition and carbon sequestration can all play in the same sandbox.   

The best is that we are all not just passive observers – but get to be active participants!  Citizens all over the globe who formerly would not have access to be a part of or benefit from scientific research now will have the opportunity to contribute and learn in inexpensive ways.  We can find each other in this open source, collaborative environment – without anyone controlling our “feeds” or search results.  This allows us to learn faster and see how these complex systems relate.

Join This Collaborative, Peaceful Movement

In Massachusetts this November 28, join us for a pre-conference, working meeting called the Vision & Strategy Day .  Give your valued input, hear how others are participating, and understand how you fit in at this meeting of the minds.  Come join us to see the global release of the Bionutrient Meter!  Order one at the conference and become a key player in this vital food, health and climate movement.

Stay for the Soil & Nutrition Conference November 29-30, and continue to learn and connect!   Major global players from movements like The Bionutrient Food Association, Savory Institute, Holistic Management International, The Rodale Institute, Soil Food Web, Permaculture, Biodynamics, Ecolonomic Action Team, and the Weston A Price Foundation will be there, among many other private and public sector players.  If you cannot join us live, we will be posting the recordings of this meeting so you can learn more! 

The pieces are coming together to allow all of the formerly disparate efforts, centers, institutes, and organizations to coordinate in more powerful ways than ever.  Through partnership and working together, instead of in our relatively small individual bubbles, we can heal ourselves, this planet, the climate, and economy.  This framework for collaboration is structured biologically, but also engages cutting-edge science and technology. It is a completely new way of relating for science, consumers, the internet, and technology — a peaceful movement that is building itself outside of outdated structures that have held us back, kept people and information apart, caused damage to learning and progress, and that no longer serve this new era of learning and positive change.

Now, the technology has arrived that allows humans to mimic underground beneficial fungal networks for planetary healing, as well as stimulating economic growth in positive and stabilizing ways.  It is a peaceful, mycorrhizal movement that EACH ONE of us can be a part of without disrupting the flow of our daily lives.  In fact, using these new tools and network will save us time, money and energy, while allowing us to do greater things.

Learn more About How Focusing on Rebuilding Soil Can Heal Our Climate Crisis Quickly

Soil Solutions to Climate Problems – Narrated by Michael Pollan:

The Soil Solution to Climate Change Film

How to green the world’s deserts and reverse climate change:  Ted Talk by Allan Savory

Soil Can Solve Climate Change

We are all in this together, and this new framework and community allows us to see where each of our specific piece of the puzzle lies.  It allows us to empower ourselves to focus on our unique talent and gifts, and meet others with whom we can synergize.  Learning from the mycorrhizal fungal networks – we can each WORK LESS and achieve MORE POSITIVE IMPACT.  

The beautiful thing is that learning more and getting involved will save you time and money.  Join us today by:

  • Contributing to and/or joining the Bionutrient Food Association (BFA)
  • Buying and using a Bionutrient Meter to test the food you buy and/or grow
  • Sharing this blog with your networks using the Share On buttons below

Are you ready to finally end that feeling of the global crises we face being “too big” or “out there”?  Come get inspired, energized and learn more!


Share On Facebookpinterestlinkedinmail

Fall Cover Crop Success – Made SIMPLE

I am often asked by my clients what they should be doing NOW to ensure long-term success. At this time of year, I tell them, “Remember that soil microbes need to eat every day, and you’ve got to feed them!” If you were left starving and naked outside all winter, would you be ready to work in the spring? Probably not. Soil microbial life is the same; in order to keep soil vital through the winter rains, freezing temperatures, wind, and whatever other weather might come your way, then cover up your pastures, cropland, lawns and gardens!

Since any system is only as good as its weakest link, anywhere that the cold air, raindrops, and wind can get to your soil without a carbon blanket (a cover of dead or living plant material) is an area where your system will shut down and cause you problems next year. If there are spaces between your plants, I like to think of them as holes in your land’s sweater and rain jacket. Brrrr! Even between your cover crop plants, you want that soil covered! Once you get effective rotations of crops and cover crops, plant residues aka “litter” from the previous crop will ensure that you have no bare soil.

Luckily, fall, winter, and early spring are the best times to build your soil.

Usually, we have good moisture in the winter. It’s not so dry as in the heat of summer, and you can build soil structure rapidly – especially if you have living roots and covered soil. Microbes are active even under the snow, especially if there is enough “litter” or plant matter covering the soil surface for them to eat. Cover crops are the best option for soil cover because they provide both carbon cover, living roots AND sugars to feed soil microbes directly. That means more soil structure and organic matter being built all winter so you have more water- and nutrient-holding capacity next spring.

In case you are new to cover cropping or need a basic refresher, this practice (sometimes known as growing “green manure”) uses winter-hardy plants that will be grazed, stomped, rolled, or cut down in the spring to loosen and aerate the soil. Although it is sometimes advised, I’ve found that it is not generally helpful to till them in to kill them in the spring, as that disturbs soil fungal networks. Of course, there are a few occasions where doing so might be warranted as a stop-gap on your way to a management approach that relies less on harmful disturbance. One example of when you may need to till the cover crops to kill them is when nutrient cycling is really shut down, and you need the tillage to break down the residues, such as when transitioning heavily tilled and/or chemically laden soil.

The Benefits of Cover Crops

When you plant cover crops in fall, you will:

  • Protect the soil from compaction, erosion, wind, freezing and nutrient loss due to hard winter rains
  • Suppress and reduce weeds during the winter, as well as next growing season if the residues are left on top of the soil
  • Maintain and enhance soil structure
  • Build organic matter and keep nutrients cycling in the soil
  • Enhance microbial diversity, numbers and activity
  • Save you $$$, labor and time! Planting into soft, fluffy soil is much easier than planting into compacted chunks, plus it takes less weeding, watering, and inputs

The Best Time To Plant Fall Cover Crops

To accomplish these goals, you’ll want to get the cover crop sown at least 6 weeks before first frost date. Usually, for spring grazing and planting, you don’t want to seed too early and have the plants flower before frost and snow, as they won’t come back in the spring. Depending on your growing zone, that generally means that ideally, cover crops should be planted before the end of September to mid-October; you want them rooted and well established before the weather gets too nasty. Sometimes you can get lucky if you are planting late, and will get a successful crop, but the risk increases and benefits usually decrease after this planting window.

How to Choose & Plant the Right Cover Crop Mixture

When choosing a cover crop mixture, consider that cover crop species and functional groups are best used in combination. If you plant them together, aim to plant a nitrogen-fixing legume with a tall crop for structural support, or use a pre-combined mix suitable for your situation. Use taprooted crops to help break compaction (but know that some of these are best planted earlier in late summer, so they develop a taproot before the frost and that taproot dies off and feeds sugars to earthworms and provides holes for water infiltration over the winter!). 8-12 species mixtures are great, but you must make sure you can kill them at the right time for your spring planting and not have to use tillage or herbicides.

Below are a few easy to seed, cost-effective, simple mixes that will work well in the American northeast for fall seeding and rolling for an easy kill without herbicides.

Winter Cereal Rye (NOT annual ryegrass) and Austrian Winter Pea (a nitrogen fixing legume that flowers at the same time as the cereal rye). These can be mixed 64 lb per acre drilled rate; increase the rate for broadcast seeding and poorer soil conditions. They can be mixed into the same no-till drill compartment, or for small applications mixed in a bucket and thrown out together. The seeds need soil contact, and ideally plant them at a depth of ½” – ¾” into the soil for best germination. If you are hand seeding them, rake in and cover with mulch. You need to get them as deep as you can if you don’t have a drill… and add more to the seed rate to compensate for attrition.

If you want to get planting earlier (about 2 weeks earlier, in fact), try Crimson Clover at 12 lbs / A (it shouldn’t spread like other clovers as long as it’s rolled down before viable seed is formed) and Barley (a winter hardy cereal grain) at 76 lbs / A . This mix is a little trickier because ideally you would plant with a technique called “alternate row” seeding. When no-till drilled, put the barley in the grain box and the clover in the legume box, but cover alternate openings with cardboard and tape so that you seed one row of barley and the next of clover. If you are at home, it’s too laborious to hand plant individual rows, so mix them and do the best you can!

How and When to Kill the Cover Crop

One reason I recommend these 2 simple mixtures is because they are both easy to kill without tillage or herbicides. If you don’t have a roller – you can use a long wooden board and stomp it down (hint: tie a rope on either end and walk on it), a mower drug across with the blades turned off, or a barrel with a little water rolled across it. The pea will vine up the rye and help to kill it come spring without herbicides or tillage. Sometimes the peas grow back up a bit after rolling, but don’t worry about this as the heat kills them.

Pro tip: These peas are great for eating as fresh salad greens all winter, and the sweet shoots are delicious in stir fries or raw. Their flowers are incredible and look like orchids!)

You want to roll or knock it down until at LEAST 30% of the rye and pea are in flower stage. Once it starts growing in the spring, this can happen quickly as they develop fast. For a visual of what it looks like when ready to roll down, watch the following video. It is the same garden from the first video in this blog post – about a month later!

A continuous-cover, no-till, living root 24-7 system is the best to give your microbes food, shelter and warmth to increase their number of days they are actively working for you. Cropping in a no-till organic system, without herbicides or tillage, requires thinking and planning ahead; it can get complex to choose an approach that meets your current and future needs. When deciding which of the many cover crop options to use (as well as when deciding whether or not you need to seed a cover and where to seed them), it is important to KNOW YOUR WHY. I always recommend getting help from an experienced mentor to help you decide which cover crops are best for your unique situation.

Read Vail Dixon's post on Cover Crops at Northeast Organic Farming Association of New York (NOFA-NY) Field NotesSee our Pro Tips blog entry on the Northeast Organic Farming Association of New York (NOFA-NY), which focuses on inoculants, to learn more about making the most of this important practice and this vital time of year.

JOIN US! Vail will be presenting more great information at NOFA-NY’s 2018 Winter Conference January 19-21, 2018 in Saratoga Springs, NY.

Share On Facebookpinterestlinkedinmail

Do your plants and soil need help NOW?

How are your plants looking?

Spring is the time of year when we see the results of our fall and winter soil management. Things often green up but then run into problems as they grow because they are running out of nutrient.

If your plants have weird colors, diseases, insects, or excessive weeds, then you can address these issues by working on the root cause of the problem… by getting your soil healthier.

However, your plants are setting their yield potential RIGHT NOW and won’t wait for the time it takes for your soil to get healthy! They need nutrition to grow a good yield… and they need it SOON.

Did you know you can take leaves or parts of your plants and send them to a lab and for less than $30 know what they need to make yield?

One of my favorite things to do is to pull a plant tissue or sap analysis. It sounds technical but all you do is go grab some leaves or other parts of the plant (varies according to what you want to know)…and send to the lab.

You get back a cute colored chart of what the plants need. Then you can give them that with a backpack sprayer, bucket and water, garden hose and fertilizer mixer, or spray rig, whatever way you can get liquid onto the leaves, and into your soil.

Here is a video of one of my favorite people helping us mix up and spray out what our plants need. Even if you can’t pull the tissue test, we have recipes that will take the guesswork out of it and make more minerals available to your plants – just HOURS after the spray we saw results!

These same products help you to buy and spread less minerals on your soils too, as you can use a fraction of the purchased mined mineral and chelate it or bind it in forms that are more bioavailable to your plant – leaving less to tie up in the soil.

It is as easy as mixing things in water – so anyone can learn! I remember when I first heard the word chelate it sounded daunting and like something I could not do on my farm. I also remember being overwhelmed and confused about spray rigs and thinking they were some expensive thing that I couldn’t make myself.

I was wrong.

So whether it’s your houseplants or large fields, we can help you design a simple program that YOU CAN DO!

One great upcoming opportunity where we will be covering the hands-on details of all of this is our upcoming Grow Your Soil workshop, April 28-30, 2017 in Nelson County, VA at our farm.

Check out www.Grow-Your-Soil.com for more info and to register! We still have a few scholarship and discounted slots available at a 75% off rate!

PS – If you want to do something but are feeling overwhelmed or blocked – write me an email and let me know what frustrates, challenges or holds you back! The more we know about what you need, the better resources we can make!

Share On Facebookpinterestlinkedinmail

Give your SEEDS a BOOST with Inoculant

Spring often brings planting!

Did you know that plants determine a majority of their potential yield shortly after germinating?

Each plant is slightly different, but the basic truth is that seeds feel out their environment when young, and set yield accordingly. So if your soil is still getting up to speed, you could be losing a valuable opportunity to increase quality and quantity of yield.

Inoculating your seed with beneficial microbes, minerals and enzymes can help jump start your production and help your soil heal!

Once I started learning about yield determination windows, it opened many doors for me because I was empowered to know WHEN and HOW I could affect yield in my systems!

One great way to improve your system is to inoculate seed just before planting with stabilized microbes and micronized minerals. We also add in a special enzyme chelator to make the minerals bioavailable and useable by microbes and plants – keeping them in forms that will not immediately tie up and become unavailable.

Learn how to get your seeds off to a great start with one of the least expensive and easiest ways to add and feed biology!

Learn HOW, WHY & WHEN to inoculate seed in the video below!

Share On Facebookpinterestlinkedinmail

Easy Tips for Helping Pollinators NOW

An early spring is upon us here in VA and elsewhere.  Trees started blooming, and now some nights in the 20’s are threatening fruit and nut crops across the state.  I wanted to take a minute to share some of my favorite tips that anyone can do to help pollinators this year.

Creating a pollinator paradise in your farm or yard is easy and fun.  You don’t have to buy any plants or spray harmful herbicides. You only have to STOP doing things that harm the bees and ourselves!  This is great because not only does it save time and money, but also helps us get more nutrient dense food. The same actions (or inactions) that help the bees underly re-building our health care, economy and ecology. Read the article below for free tips.


Here are three quick things you can do now to help:

  1. Check out the video above
  2. See below for a short but info-packed article with tips for you to do now to help pollinators in your yard, driveway, or farm.
  3. CLICK HERE to receive your FREE Healthy Bee recipes and to receive occasional handy tips and trainings about pollinators. These recipes are inexpensive and easy-to-make probiotic & mineral foods that you can easily offer to bees in your yard or farm.  Their use has greatly reduced bee death rates from over 40% down to 2%, make better quality and quantity of honey, and more docile, larger bees.  Your information will only be used privately for our personal communications with you, never given away or sold.  Signing up will let us know that you are interested in helping pollinators and receiving updates about upcoming trainings, etc.

Winter warm spells can fool plants and animals like pollinators to come out earlier than normal, but then they can suffer decimation if cold snaps kill them off.  Bees in particular are vulnerable if they come early with warm temps to find a lack of viable blooms. They can use up too much energy moving around as opposed to dormancy and die easily.

Grass started jumping here already this year, and many are getting geared up for mowing season.  The number one thing that reduces cost and helps pollinators is to stop mowing areas that are not necessary.  

When I first moved to our new farm I didn’t own a mower or bush hog.  I still don’t.  We do have a weed eater for critical areas, and use our “lawn moo-er” cows, chickens, and horses to mow the sides of our driveway, our yard, etc.  We let areas grow up.  I NEVER KNEW HOW BEAUTIFUL these flowers and plants were until I stopped mowing – much less how beneficial!  

They give me enjoyment year round – from seeing them collect water in drought from catching water out of the night air into spectacular arrays of droplets in the morning.  They also give me year-round colors and sprays of flowers right out of my windows and doorsteps – which are buzzing with bees, butterflies and all sorts of beneficial pollinators and insects. As they fruit, these “wonder plants” provide structure for tons of birds and incredible spiderwebs (natural fly control).  Then in winter I watch the birds and our free range chickens getting winter food and having a place to rest.  And even better, I see their roots feeding tons of soil life and earthworms and de-compacting my soil over the winter! We leave corners and patches all over our farm un-mowed.

Check out the pollinator article below, and CLICK HERE to instantly receive free recipes of microbes and minerals that you can easily offer to help bees!

CLICK HERE for another great article on creating habitat and recognizing local and native pollinators.

Our health and survival depend on ALL OF US!


Here is a recent article with tips and the foundational concepts for helping pollinators that often get missed by many bee programs.  Written for a grazing magazine, it’s principles and many of the tips also apply to your yard and home.

CLICK HERE to download a PDF of the article

Pollinator Pastures
6 Tips to Turn Your Farm into a Pollinator Haven

Pollinators are in great danger all over the world.  Because bees are critical to our food supply, anyone who eats has an interest in helping them survive.  The good news is that we already know what to do to help them – and that those same actions will help tackle many of the large health and environmental problems we face today.  It is empowering to know that we can all can take small actions that make a HUGE difference.

Simple Soil Solutions - pollinator habitat-bees

Pollinator habitat can be included in productive pastures. Many beneficial grazing forage plants have flowers that at different times of year support pollinators. By healing your soil you can create diversity in your fields – so you have year round grazing and pollinators have season long flowers! Plus, these plants provide critical habitat and food for critical allies like birds and spiders – needed for insect and pest control.

The widespread use of chemicals is disrupting the bees’ ability to get the minerals they need to be healthy.  The colonies are “collapsing” from disease for many reasons, but the root of these problems is lack of nutrition.  Luckily, your pastures and lawns and sides of your driveway can provide critical habitat and food for them.The loss of our healthy soil biology has disrupted soil mineral cycling.  Many commonly used chemicals not only harm the microbes that fertilize our plants, but also tie up critical nutrients and further starve the bees.  When an organism is malnourished, a host of diseases and problems arise.

Simple Soil Solutions - pollinator habitat-milkweed

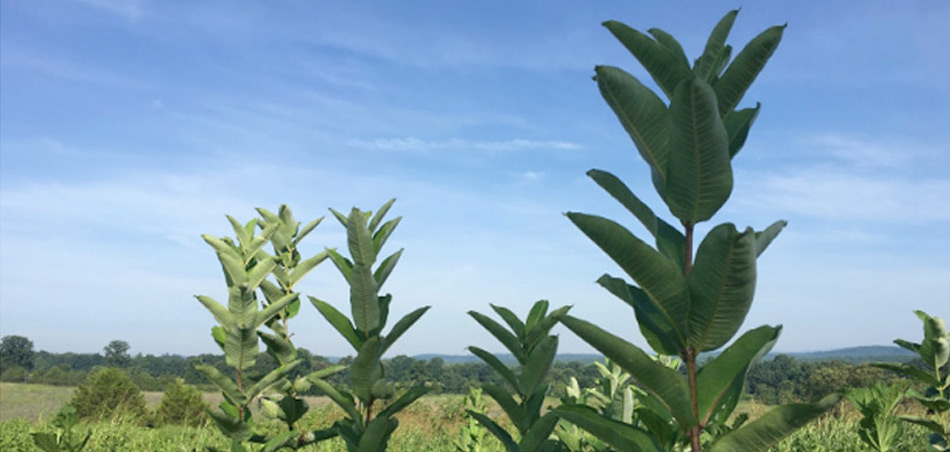
This is the edge of our yard where we stopped mowing. Milkweed is often found in our fields, unmowed edges of yards or fields, and is CRITICAL food for the monarch butterfly on its long migration to breed in South America. It has beautiful flowers and smells HEAVENLY!

Healing these issues, both for the bees and for our own health crisis, involves healing our soil — getting the right microbes back in the soil and our guts.  These microbes are essential — for us and the bees — to create health literally from the ground up!  When we can do this, minerals cycle again, making our immune system healthy and our DNA replicate health instead of disease.  Microbes plus minerals = MAGIC.

Here are some tips to help the bees (and us) thrive!

  1. Reduce or eliminate use of chemicals like herbicides, pesticides, insecticides.  For fly control without insecticides, replace chemicals with natural essential oil-based repellents.  Use native beneficial insects like fly predators, and traps specific to the fly you want to catch. Create habitat for songbirds and spiders.

    The best fly control is getting your soil and field habitat healthy enough so that manures break down within days and don’t sit there as habitat for fly and disease and parasite larvae.  The upside of taking this approach is that your pastures will be healthier, more nutrient and energy dense, as well as more productive.  Most often if the manure is sitting on the soil surface there are chemicals or some harmful disturbance to the soil ecology or moisture (like mosing too short so the soil dries out).

    The following are common areas of disturbance in grazing systems – where we find that stopping adding harmful inputs will save money while creating better nutrient cycling and reducing the pest cycle.  It is best to stop spending money and time and get a greater return – multiple benefits from one action (or inaction).

    Don’t spray your fields for weeds.  Weeds are just a stage in land healing.  Instead, what to feed your soil to heal that will prevent weeds from germinating and move into healthy grassland.

    Cut out any non-GMO corn, soy, barley, alfalfa, etc in your animal’s feed.  Remember that herbicide residues in our animal’s feed harm bees also.  These residues are are commonly present at levels that exceed safe levels, and tie up minerals in the gut, which weakens their immune system and body’s ability to function.

  2. Stop using dewormer without a fecal test first, and choose natural dewormers that have been proven to work such as walnut hulls, herbs, and essential oils.  Parasites only inhabit animals who are not minerally dense and whose immune systems are not functioning well. Deworming with chemicals will shut down your soil and manure decomposition, so focus on how to create a healthier animal, instead of fighting the parasites that are just messengers that our management is off.

    It is possible, and even essential, to get our farms (and bodies) of of reliance on destructive chemicals, and the outcomes are always better than conventional management with chemicals.  Think of it as creating a healthy system instead of managing dis-ease.  Find someone who knows how to do this to show you.

  3. Reduce or eliminate mowing – or mow HIGHER (12” if you can).  This allows plants to flower.  If you have to mow, leave flowers in the critical time periods when the bees really need food (early spring and late fall).  It is better to use the animals to trample and stomp the litter into contact with the soil than to mow and leave it to oxidize on top.  The animals will naturally leave some plants tall and those can flower for pollinators and provide habitat for spiders and songbirds – while still feeding the soil well.
  4. Leave patches or strips un-mowed.  We all have corners of our property or yard where we can leave patches for pollinators, while still being able to mow critical boundaries and keep the brush away.

    You will likely be surprised to find out how beautiful these flowers and plants are that come up when you don’t mow.  Go out and see them with the morning dew glistening – not only is it exquisitely beautiful, you will see how during times of drought these plants collect water from the air and will keep your pastures healthier by infiltrating water down to the ground.

  5. Create Year-Round Food for the bees – if you don’t have flowers year round, put out some honey or syrup and mix it with micronized minerals and probiotic cultures of microbes for the bees.  Get the recipes for free at the link below.  Research shows that combining the microbes, minerals with the sugar reduces the death rates tremendously, plus the bees become larger, more docile, and the honey is a higher quality and quantity (which will help the hive have enough food to last through winter).

    Feeding the bees is especially important if warm spells happen during winter and you see the bees out but there are no plants flowering. Climate change is causing premature warm spells during winter, which tricks the bees into coming out too early.  This uses up their winter energy stores.  You can help by supplementing during these hard times so they can live until spring.

  6. Learn to appreciate and cultivate a different sense of beauty than the perfectly manicured mowed lawn and edging. Nature’s design and patterning is exquisite and as beautiful as high-priced landscaping.  Plus it changes each year!

    The beauty and vibrancy that nature creates in un-mowed patches will delight your senses and provide vital food for bees, plus habitat for beneficial insects like dragonflies, birds, and spiders that eat mosquitoes, ticks and flies.  Even as these “weeds” are dying, dig up their roots to see how they feed microbes and earthworms like crazy as they decompose.  This reduces compaction and allows water channels to hydrate your soil more deeply.

Who knew that managing for bees would also help you manage for drought and flood by creating better soil, which directly saves costs and creates more profit?… reduce threats of parasites and infectious disease…and provide more nourishment and less chronic disease for ourselves?

Helping the soil and pollinators truly improves the “triple” bottom line.  How wonderful and cost effective it is when the same set of actions tackles many of the toughest problems that we face today?  It is well worth the time to make small modifications in your system to create big positive impact.


Vail Dixon is a regenerative farmer who raises Grass Beef in Nelson, VA.  She is a holistic grazing and soil rejuvenation mentor – to help people rebuild their soil’s productivity naturally.  

Check out GrazingPower.com and Grow-Your-Soil.com for upcoming workshops and trainings.

Share On Facebookpinterestlinkedinmail

Case Study – From WEEDs to productive pastures – in 2 years

You get the advantage of viewing years of testing and research in just 11 minutes.

Want to get rid of your weeds with NO added inputs?

Watch a 2 year transformation from mud hole and weeds to healthy diverse pasture – without ANY seed, herbicide or fertilizer – just using our wastes differently!

In this video, I take you through the transformation of our upper field, which went from a mud hole to a carpet of diverse plants by implementing simple and natural methods.

You will witness before and after photos, as well as progress at various stages of the process. Not only did grass and plants flourish, but weeds were wiped out, using just the power of our horses.

No chemicals or machines. Our soil and land didn’t just start to look better, it rebounded to super healthy levels much quicker than we ever thought possible.

I’m taking you inside our process in this short video. Watch the incredible results!

Enjoy, and if you’re ready to improve your own pastures, be sure to check out our Grazing Power Online Training Program!

Grazing Power Training Program with Vail Dixon


Share On Facebookpinterestlinkedinmail
There are no products
NOW HIRING! CLICK HERE to see more details and how to apply.