Free Food!
Who wouldn’t want to live in a carefree food forest where little work is required, and delicious fruit and nuts are abundant? A Garden of Eden, right? Believe it or not, Gardens of Eden do exist in real life and we can easily plant them in our back yards or as entire orchards.
A Garden of Eden would be based on plants that work together to form a synergistic web of life. Different heights, plant functions,root structures, and countless other intricacies and dependencies have evolved in native forests to make plant partnerships (or guilds) that have withstood the test of time. These guilds don’t require outside fertilizers or care and they provide food year after year after year, just like a native forest.
It’s Hard Work to Re-Invent the Wheel… So Don’t Try!

Passionfruit is delicious, has an incredible tropical flower, and is the host plant for many butterflies.
I’ve tried my hand at designing guilds to make food forests. To make a guild, I place plants together that I think would help each other. I first pick a canopy (or overstory), and then a sub-canopy (or understory) and some shade-tolerant bushes. One third to one half of my trees/bushes/plants are nitrogen fixers for natural fertilization. I make sure to choose vegetation with different root structures and of course we need a ground cover. I add vines for good measure.
That is a lot to remember! I have read dozens of books, spent long hours on the internet and have 28 years of farming experience. I’ve spent much time agonizing over whether or not these guilds were going to work because there is no guarantee. There is just the enticing promise of knowing that if it does, it will be spectacular.
After hundreds of hours of researching, memorizing, and racking my brain, I realized that I have the recipe built into my climate and soil if I simply pay attention. If let my pastures go without grazing or mowing them, natural succession would eventually move them to the final stage of an Oak-Hickory forest. Hmmmm. Hickory nuts are edible, and acorns can be processed into flour! Free food, no work. Better yet, pecans are in the hickory family and chestnuts are in the oak family. Both are native to this forest, and both are delicious. How amazing is that? What other food is in this forest? What if I sped up succession and planted an orchard that used the same species that would naturally grow here? Instant foolproof food forest! Eureka!
Follow Nature! All the Work is Already Done!
Patterning an orchard based on an existing Garden of Eden makes all the sense in the world. It is the holy grail of designing a food forest because success is guaranteed, or at least a lot more likely. We are following the well-worn path of nature instead of trying to blaze our own trail and getting lost.

Both Asian (left) and Native (right) persimmons are delectable treats.
The Oak-Hickory ecosystem is the largest deciduous forest ecosystem in the Southern and Central United States. It feeds kajillions of animals every year, and has helped keep human inhabitants fed for millennia. This Oak-Hickory forest runs North-South from Rhode Island to northern Georgia and East-West from South Carolina to Ohio with scattered patches elsewhere in the US and Canada.
The South Carolina Department of Natural Resources has a listing of South Carolina ecosystems called The Natural Communities of South Carolina Initial Classification and Description by John B. Nelson. It’s not an easy read. The first time I picked it up, I put it right back down after finding that our Oak-Hickory forest was a long dry list of Latin names. I know some Latin names from my interest in gardening, but in general it’s not my first choice of languages.
After hearing several people lament that they wanted a guild for a food forest that they knew would work, I put on my big-girl britches and decided to decode the gibberish into something usable. I took the Latin names, translated them, and then looked for the benefits of each species. A surprising majority had delicious fruit/nuts. Not every plant in the guild is useful for food, but that doesn’t mean it shouldn’t be included in your yard or orchard. Many of the plants are good for wildlife, and/or are simply beautiful with mysterious ties to the rest of nature that we can’t even fathom.
Foolproof Fruit!

Pawpaws are a delightful, unique fruit you can easily grow. Make sure you have two cultivars so they can pollinate each other.
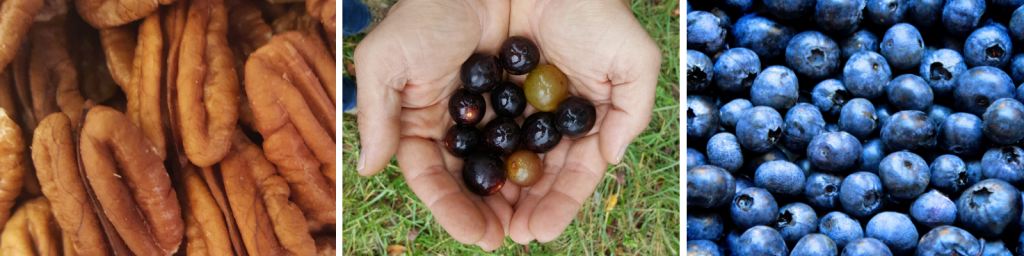
The fruit of my labor is in the table below. My mouth waters at the thought of pecans, blueberries, highbush cranberries, pawpaws, persimmons and grapes. Truly, a real Garden of Eden.
I have planted over 300 trees following this recipe, and am starting to reap the rewards. The best part is that I have lost very few plants, even in drought years.
I look forward to many more years of wandering around eating fruit all year.
I hope you enjoy salivating over the possibilities in the table below. You may even be tempted to change your name to Adam or Eve! Happy Planting!
Oak-Hickory Forest Guild Members
Common Name |
Latin Genus |
Kirsten’s Use/Notes |
Overstory |
||
| Oak | Quercus | Flour from acorns, lumber, one of the best wildlife trees |
| Chestnut* | Castanea | Chestnuts were not found in my Oak-Hickory research, but chestnuts are in the same family as oaks. Oaks took over after Chestnut blight killed all of the Chestnuts in the East. Chinese chestnuts that are not susceptible to chestnut blight are commonly grown in Piedmont soils. Delicious edible nut. |
| Hickory | Carya | Most are delicious, but the nut meats are difficult to extract unless you boil them. |
| Pecan* | Carya | While not included in my literature search as a part of the Oak-Hickory forest, pecan is in the same Carya genus an is native to the Southeast US. Delicious edible nut. |
| Red Maple | Acer rubrum | Seeds are edible, but can be bitter |
| Tulip Poplar or Tulip Tree or Yellow Poplar | Liriodendron tulipifera | Great pollinator attractor. One of the best trees for honey bees. |
| Pine | Pinus | Wildlife habitat and food. I have tried to grow Korean pines for pine nuts, but they did not do well in the Oak-Hickory system. Other pines used for pine nuts in the US are primarily from the Southwest, so again, are not native to this region. Native pines include white pines, which do not have a readily available, delicious nut. |
| Tupelo | Nyssa Sylvatica | Excellent pollinator attractor. Fruit eaten by birds |
| Black Locust | Robinia pseudoacacia | Nitrogen fixer, goat/cow forage when coppiced, excellent nectary, delicious flower |
| Persimmon* | Diospyros virginiana | It is not widespread throughout the entire Oak-Hickory area, but in the southern and Mississippi Oak-Hickory areas it bears a delicious fruit with unrivaled sweetness when fully ripe. Asian cultivars are also delicious, with larger fruit and better shelf-life. Some varieties are even non-astringent. |
Understory |
||
| Sourwood | Oxydendron arboretum | Excellent pollinator attractor |
| Flowering Dogwood | Cornus florida | Beauty, fruit for birds |
| Cornelian Cherry* | Cornus mas | Same Cornus genus as flowering dogwood. Very tart cherry |
| Eastern Redbud | Cercis canadensis var. canadensis | Flowers and seed pods are edible. |
| Pawpaw | Asimina triloba | Largest native fruit in North America. About the size of a mango, tastes like a custardy banana with an astringent afternote. You either love them or you hate them. Found in moist lowlands. Primary host plant for the zebra swallowtail butterfly. |
Vines |
||
| Muscadines | Vitis rotundifolia | Delicious grapes |
| Passion Fruit* | Passiflora Incarnata | Fragrant fruit and stellar flowers. Native on forest edges Host plant to the Gulf Fritillary, Variegated Fritillary, Julia Heliconian and Zebra Heliconian caterpillars. |
Shrubs |
||
| Hearts a bursting | Eunonymous americana | Excellent deer fodder (and therefore goat fodder. Goats and deer are in the same family) |
| Sweet shrub | Calycanthus florida | Fragrant flower. Can be used for potpourri |
| Viburnum | Viburnum | This is the listing in the reference material. See below for the actual edible species. |
| Highbush Cranberries* | Viburnum triloba | Note that this is not the same as regular cranberries. Also, most viburnums are mildly poisonous to people, but Highbush Cranberries are not. |
| sweetleaf, horse-sugar, yellowwood | Simplocos tinctoria | Tea from leaves. Host to butterflies. |
| Blueberry, cranberry, huckleberry, lingonberry | Vaccinium | All edible. Some may prefer colder/warmer/drier/wetter habitats than others. Research before planting. |
*Not from original natural community. I added it because the genus or family matched the listing in the original resource, and I knew it provided excellent food.
 Kirsten Holland Robertson is a regenerative farmer and SWCD Educator in Greenville, SC. In addition to growing her own vegetables and raising her own sheep and goats in a dynamic permaculture based, holistically managed agroforestry silvopasture system, Kirsten manages the lively Facebook ReGenerative Grazing community group. After finding Vail and joining the Grazing Power community, she has joined our team, partnering with SimpleSoilSolutions.com to create holistic grazing and soil building mentorship programs, and offers us support. Look for RegenaGraze.com.
 Hugelkultur beds are extremely popular in permaculture circles. Raised beds built over a mound of logs and woody debris, they are self-watering as the logs decompose, and provide intriguing microclimates with which to play. There are multiple websites on how to build one, but how do you actually use them? This blog addresses that. It is not about constructing a hugel bed, but how to maximize your growing potential (in our southern climate, zone 7) after it is built.
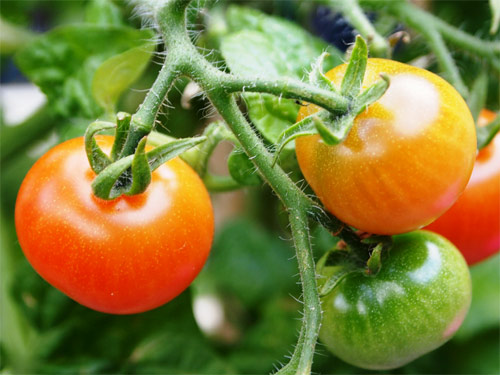
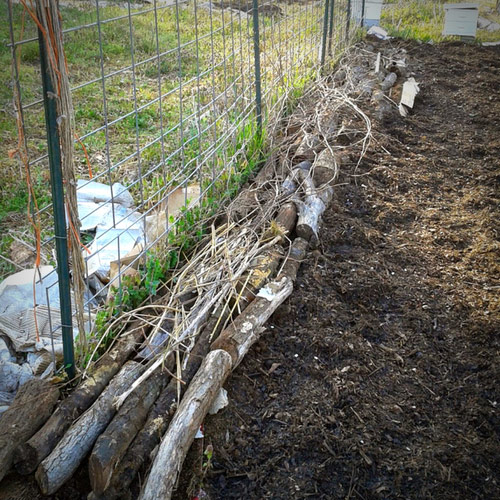 The first two years with the hugels I didn’t have time to really think about where I wanted to plant things on the beds. I threw stuff in, and it all grew. I’m very happy with the results. This year I decided to be a little more methodical about using the best properties of the beds – the fantastic microclimates. Using a fence for a trellis is derived from the Square Foot Garden method by Mel Bartholomew. He puts trellises on the north side of his beds and lets the tall and climbing plants grow there. I have used his method for about 15 years so I can’t comprehend gardening without the trellis. I trellis all vines, including cantaloupes, cukes, squash, and beans as well as tomatoes. I tuck the tomatoes through the fence as they grow. No strings or falling cages. This keeps the fruit off the ground, makes it easier to harvest, allows air to circulate through the plants, and makes a LOT more room for other plants.
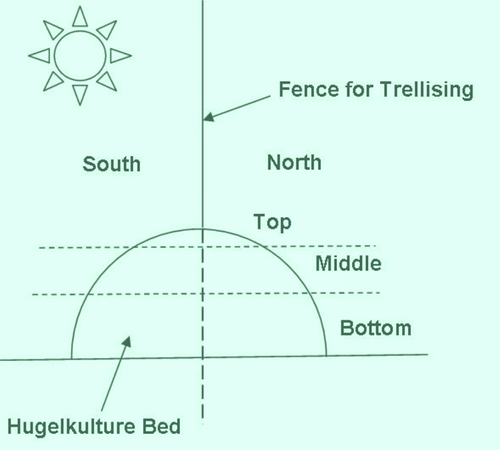 north sides are noticeably cooler and moister. It’s not rocket science, but when the contrast is so stark, it brings home the beauty of Hugelkultur. In addition, the beds are drier at the top, and more moist toward the bottom. This steps up the complication factor a little.
 I can plant on both sides of the trellis, so I can plant cantaloupe and runner beans on the same trellis at the same point on the bed, just on either side of the fence. This allows the beans to fertilize the heavy feeder cantaloupes. I have done this, and used the Square Foot method, so there are 8 bean plants on one side of the trellis in a one-foot distance, and one cantaloupe plant on the other in the same one-foot distance.
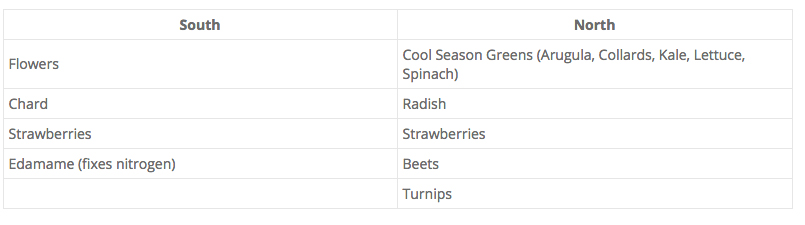
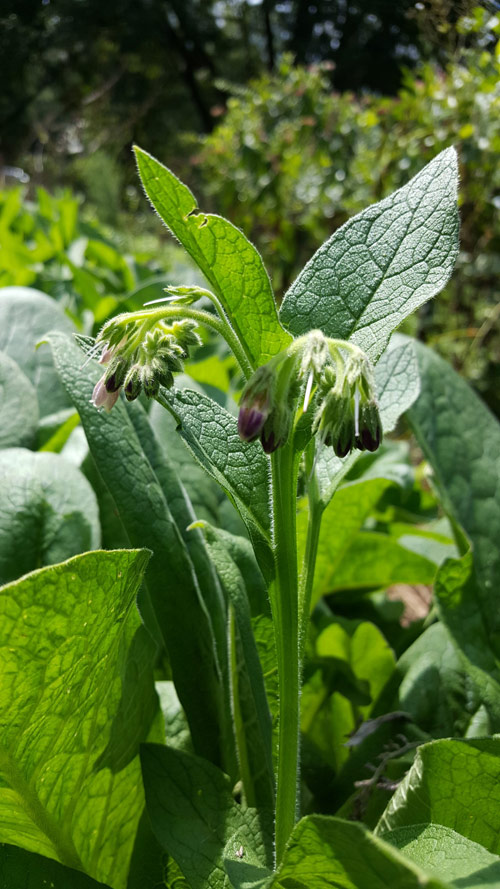

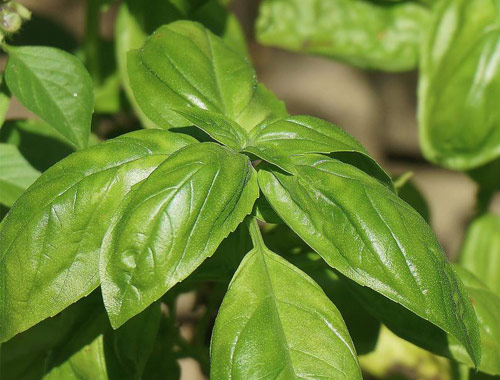 Herbs are probably my favorite in the garden. I enjoy being able to run out while cooking and grab something that makes the dish over-the-top amazing. I plan to plant all of my herbs at one end of my hugel because there are so many perennials and biennials that make me happy. If I intersperse them with the annual garden plants, I risk disturbing their roots every change of planting season on the hugel beds. Yes, I realize that this is the purpose of an herb spiral, but herb spirals just don’t float my boat, AND, I already have a hugel built. This is my list of herbs:
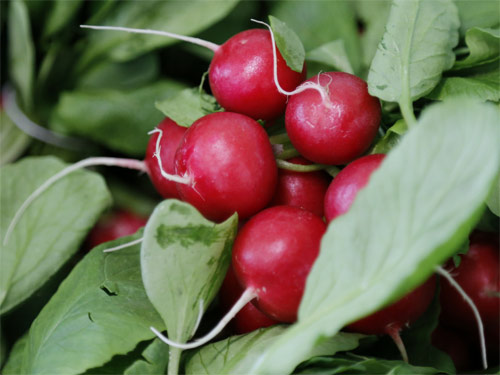 I’ve also separated out root crops because of the whole root disturbance issue with surrounding plants. I will plant a bed or a half of a bed in root crops alone. I don’t recommend planting root crops until the hugel has had a chance to decompose some. Otherwise the roots are growing down into the logs and aren’t easily harvestable. The smaller root crops like radishes and small turnips are probably fine for the first few years or so.
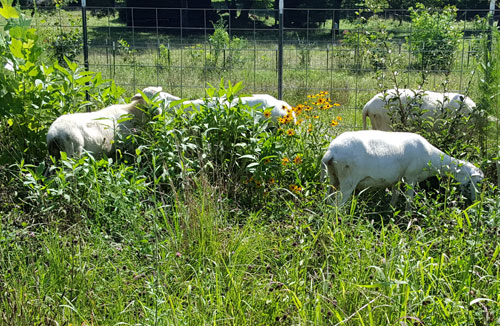 I hear a lot of people saying that they want to ‘do it right’ when they start regenerative grazing. That is a noble goal, but in truth it’s a hard one to nail down.
 Well, the bigger issue is just to get started! I procrastinated for about 15 years before actually starting. I decided to rotationally graze 20 years ago, bought the netting 15 years ago, and actually STARTED 5 years ago. There really is no wrong way to start. You just have to get out there and watch your animals and your forage and start trying different things. Everyone’s farm is different, so you are not behind, and you aren’t doing it wrong. If you are thinking about it and asking questions and making an effort, you are doing it right!
 My hay feeding went down by 50% the first year I regeneratively grazed, but I realized in the following years that feeding hay was not a bad thing. It serves several stacking functions. If I feed by spreading the hay out on new pasture every day when needed, I feed the animals and give habitat and food to the soil microbes. Hay covers the soil to keep the pounding of raindrops from loosening the top layer of soil during a storm, causing erosion. Hay gives me infinite options to hold my animals back in the summer if the next paddock is not ready to graze. Feeding hay in the spring along with lush grass keeps the animals’ digestive systems going and prevents bloating and the squirts. I have found, for now, that my regenerative grazing includes hay every season of the year.